Thursday, March 28, 2013

Spring is Here Giveaway !

I really love Spring, with temperatures nice and cool but not freezing and Spring bulbs popping up everywhere. That's why I choose this cute outfit for my next giveaway. I love the bright colors. And we all know "color" is in right now.  Good Luck Everyone !


Includes :

Tunic w/ flowerStriped leggings
Matching satin flats

Doll is not included :)


How To Enter
  •    1)Become a follower, if you are not already...

  •  and :
  • Go to the Daydream Doll Boutique web site and take a look aroundCome back here and leave a comment telling us your favorite  OUTFIT  and what you would pair it with from the website.
  • Get bonus entries by letting your friends know about the giveaway. Get one extra entry for the following, please come back and leave a another comment telling us where you shared it:
  • Post about it on your own blog or in a forum/board 
  • Share it with your friends on Facebook
  • Twitter this Giveaway
  • Pin us
Rules
  • Leave your comment(s) no later than midnight APRIL. 30 , 2013.
  • If you are under 14, you need to get a parent’s permission to enter.
  • Please claim your prize three days after the close of the giveaway or we have to draw another name
  • No purchase is necessary
  • Good Luck everyone !
  • Winner is decided by Random.org

Tuesday, March 26, 2013

Make It Monday- 1930's Inspired Easter Bonnet


Ok, so did not make it here on Monday, ( crazy life ) but here is Karens next fun project for us to give a try !


Daydream Doll Boutique’s Make It Monday March 25


This month Daydream Doll Boutique’s Doll of the Month is Kit. So in keeping with the 1930’s theme I have created an Felt Easter Bonnet inspired by the wonderful hats of the 1930’s.
This hat is an easy to make and sew project for your dolls.
To make a hat of your own you will need:
-1 piece of felt the color of your choice for the hat (I used dollar store felt in the color of Raspberry)
-Felt scraps in the colors of your choice for flower embellishment
-A button
-A Sewing Needle
-Thread
-*Sewing Machine (this hat can be easily hand sewn but a machine does make it quicker!)
-A small plate (I used a luncheon sized plate  that was 7 ¾ inches across)
-Scissors
-Your Doll


Step 1- Choose your supplies. Fold your felt in half like a horizontal birthday card.
Step 2- Place your plate on the felt and cut around the bowl edges. Leave the top fold in place do not cut it.
Step 3- trim your felt hat edges if you have any ragged edges.
Step 4- Sew down the sides of the hat from the fold to the raw edges at the bottom


Step 5- Roll the edges of your hat as shown in the photo above and place on your dolls head. You can sew around the edge or leave it rolled. You will attach your flower embellishment on the roll and sew it into place in the next few steps.


Step 6- Choose the color felt you wish to use for your flower embellishment. Cut out your shapes, I cut out Butterfly shapes to create a large layered flower for my hat, you can cut out any shape or style for your hat, add as many or as little flowers as you would like.
Step 7- Layer your cut outs and when you are happy with your flower add a button in the center.
Step 8- Thread a sewing needle and sew your flower together, leave he needle and thread on the back side of your flower
Step 9- Hand sew your flower in place where you would like on your hat and then tie off and knot the thread end on the inside of your hat. Trim your thread.


Step 10- Place it on your dolls head and enjoy!
I hope you enjoyed this weeks make it Monday  Craft and I hope you have a wonderful Easter. ~Karen Owen aka Karen Mom of Three

Today I used my American Girl Doll Ruthie.

Sunday, March 24, 2013

What's New at Daydream

Our first Spring Boutique is now over, thanks to all those who stopped by our booth. It was a great show.

Here's a few pictures of our booth and our cute little dolls hard at work.


Be sure to join us back here Monday for a new craft from Karen, and Wednesday we will be posting our new Giveaway. Thanks for stopping by  :)

Monday, March 18, 2013

Visit Us at Holy Cow Boutique this Week !

This week we will be at Holy Cow Boutique. We have lots of Spring styles in, and a really great Sale bin right now, where you can pick up some great items at discounted prices. So if you can , stop by !


Friday, March 15, 2013

Kit Kittredge Word Search- A FREE Printable

I created this fun word search as a perfect way to start an AG party as you wait for other guests, or a fun activity to do an a rainy day. 


Enjoy !


Monday, March 11, 2013

Make it Monday-Kit's Penny Pincher Birthday Set Remake


Daydream Doll Boutique Make it Monday
Make your own version of Kit’s Penny Pincher Birthday!


This month Kit is the Doll  of the Month here on Daydream Doll Boutique and today’s doll play craft is inspired by Kit’s Penny Pincher Birthday Set and the set currently offered by American Girl (http://store.americangirl.com/agshop/html/item/id/228441/ctc/XSCOORD).
I was surprised to hear that the American Girl version of this doll play set is back ordered until July 2013. While you wait you may just want to try today’s craft to help you past the time.
To make today’s craft you will need:
Flower Arrangement
-A mixture of artificial flowers, I got mine at the dollar store
-wire cutters
-small pot, I got mine at Michael’s the craft store
-A piece of Styrofoam or floral foam
Chocolate Log Cake
-White and Dark Brown Polymer clay
-A rolling pin
-Paper
-Knife
-Oven safe dish
-Oven pre heated to the polymer clay’s manufactures recommended setting
-Oven mitt
Sorbet
-Small lids or doll sized dishes you already have
-A mixtures of orange mini pompoms
-A clipping of artificial flower leaf
-Scissors

*You will also need doll dishes, Tea cups & Tea Pot, Juice Cups you already have on hand doll size cutlery if you have it. Use what you have, if you are looking for a doll sized tea set check your dollar store!

Table Cloth
-White fun foam cut into a 12 inch by 12 inch piece
-A green marker
-A red marker
-A ruler


To make the Flower Arrangement:
Step 1- Use a  pair of wire cutters to cut the flower stems down to size. I cut mine about 3 inches long.
Step 2- Put a small piece of Styrofoam or floral foam in the bottom of your small pot
Step 3- Start arranging your flowers by pushing the stem into the foam, while alternating the flowers to create a beautiful bouquet. When you are happy with your arrangement put it aside and start on the Chocolate log.


To make the Chocolate Log:
Step 1- Pre heat your oven to the polymer clay  manufactures recommended setting.
Step 2- Open the white polymer clay, use your knife to cut the square in half. Wrap the side you are not going to use and store it for another craft.
Step 3- Use your rolling pin to flatten your clay you will want to roll it out as shown in the photo above.
Step 4- Unwrap the brown clay and repeat step 1 with it.
Step 5- Once they are the same shape and thickness place the brown on top of the white and sausage roll your clay.
Step 6- Use your knife to trim the clay overhang so you will be able to make clear and clean cuts and your slices will be equal in thickness and size.
Step 7- Use your knife to cut a slice about ½ inch thick. Cut at least 2 slices for your dolls but you can cut as many as you need for the amount of dolls you have. I left part of the log so I could use it as a display cake on the table. *Knife tip do not “saw” your knife rather just push it straight through so you have a clear swirl in your cake.


Step 8- Place your slices and remaining log on to a piece of paper and put the paper and place in the oven, bake for the time recommended by your polymer clay manufacture. Mine baked for 30 minutes.
Step 9- Remove from the oven and cool completely.


Sorbet:
Step 1- Choose your sorbet containers. Lids make great doll play dishes if you do not have the right cups in your own collection. Use what you have.
Step 2- Open your pompoms and arrange in your containers.
Step 3- Use one of the left over stems to create a mint garnish. Use a pair of scissors and cut a small leaf for the top of each bowl.
Step 4- Set aside until you are ready to set the table


To make the table cloth:
Step 1- Cut a large piece of white fun foam to 12 inches by 12 inches if you have not already done so.
Step 2- Use your ruler and your green marker to create a double boarder all around your fun foam. I measured ½ inch all the way around and then ½ between lines.
Step 3- Use your red felt to make dots inside your border.


Now it is time to set the table and enjoy Kit’s Penny Pincher Play Set you created!
~ By Karen Owen aka Karen Mom of Three for Daydream Doll Boutique
Today I used my American Doll Room  http://www.americandollroom.com/
My American Girl Doll Ruthie wearing a dress made by a friend
My Doll Tea Set is from my local dollar store

Saturday, March 9, 2013

Kit Kittredge- In the Kitchen

As we continue our focus on Kit this month one thing that has always made me curious is, what did they eat in the 1930's and was it like anything we eat today ? I did a little online research and found an amazing website that really breaks down what everyday meals looked like. Here is a small excerpt:


FAMILY MEALS: 1935 
The following menus are extracted from Ida Bailey Allen's Cooking, Menus, Service, [Garden City:New York] 1935
Breakfast (fall menus) (p. 20-21)
  1. Stewed prunes, corn flakes and milk, boiled eggs, toast and butter, coffee, milk.
  2. Oatmeal cooked with dates, top milk, bacon, muffins and butter, coffee, milk.
  3. Pears, cracked wheat, top milk, creamed codfish on toast, coffee, milk.
Lunch (fall menus) (p. 20-21)
  1. Poached eggs with rice and cheese, Graham bread and butter, grape jelly, cocoa.
  2. Boston baked beans, steamed brown bread and butter, piccalilli, canned peaches, tea.
  3. Chicken or veal soup, dumplings, mince pie, tea.
Lunch/School lunch box menus (p. 45-6)
  1. Peanut butter and entire-wheat bread sandwiches, scrambled-egg sandwiches, raising ginberbread, an apple, milk (hot-cold bottle).
  2. Creamed chicken, ham or veal and entire-wheat bread sandwiches, jelly and white bread sandwiches, a hard-cooked egg, sponge cake, lemonade.

Dinner (fall menus) (p. 20-21)

  1. Vegetable bouillon, meat loaf, stewed tomatoes, baked potatoes, bread and butter, lettuce, celery and grape salad, gingerbread with whipped cream, black coffee.
  2. Chicken or Veal Fricassee, boiled rice, buttered beets, sweet pickles, bread and butter, hermits, sliced oranges, black coffee.
  3. Broiled halibut of mackerel, parsley sauce, spinach, spaghetti Itilain, bread and bitter, spice cake (left-over) served with custard sauce, black coffee.
Find more foods of the times here: Food Timeline

Most of these foods look like things we still eat today, but I know for sure my kids would not eat stewed prunes :) Below I have picked two recipes from that time period that I think really showcase their creative thinking in making desserts that mimicked a more expensive version. Might have to try one of them..... 

Depression Era Recipes:

Here are some authentic Depression era recipes:

Vintage Eggless, Milkless, Butterless Cake

1 cup water
2 cups raisins
1 tsp. cinnamon
1/2 tsp. cloves
1 cup brown sugar
1/3 cup lard (shortening)
1/4 tsp. nutmeg
1/4 tsp. salt
2 cups flour
1 tsp. baking soda
1/2 tsp. baking powder

Place water, raisins, cinnamon, cloves, brown sugar, lard (shortening), nutmeg and salt in a saucepan and mix. Place on heat and bring to a boil. Cook 3 minutes. Allow to cool, then sift together the flour, baking soda and baking
powder. Stir into cooked mixture.
Place in a greased loaf pan and bake at 350F for one hour.

______________________________________…

Ritz Mock Apple Pie

The classic pie, featuring Ritz crackers baked in a golden crust, is perfect for the holidays. 

Pastry for two-crust 9-inch pie
36 RITZ Crackers, coarsely broken (about 1 3/4 cups crumbs)
1 3/4 cups water
2 cups sugar
2 teaspoons cream of tartar
2 tablespoons lemon juice
Grated peel of one lemon
2 tablespoons margarine or butter
1/2 teaspoon ground cinnamon

Roll out half the pastry and line a 9-inch pie plate. Place cracker crumbs in prepared crust; set aside. 

Heat water, sugar and cream of tartar to a boil in saucepan over high heat; simmer for 15 minutes. Add lemon juice and peel; cool. 

Pour syrup over cracker crumbs. Dot with margarine or butter; sprinkle with cinnamon. Roll out remaining pastry; place over pie. Trim, seal and flute edges. Slit top crust to allow steam to escape. 

Bake at 425°F for 30 to 35 minutes or until crust is crisp and golden. Cool completely.


Thanks for stopping by, and join us back here Monday for a new Make it Monday from our ever creative Karen Mom of Three.

Wednesday, March 6, 2013

Inspired by Pinterest- Doll Spa Kit

Ok, so I am in love with this little spa kit I saw on Pinterest. And I don't think it would be to hard to make. Will work on that..... but here is a picture. The set includes an eye mask, slippers and cucumber stickers for the dolls eyes. So cute.....I just love Pinterest :)


Monday, March 4, 2013

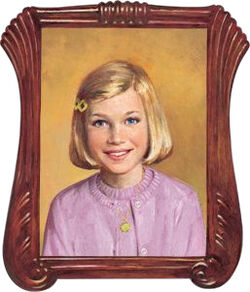
Doll of the Month- Kit Kittredge

I really love the historical characters of American Girl so I thought it would be fun to feature a doll each month and find some inspiring things about them and their times.

We will feature some recipes, crafts and a few more fun ideas . Kit has always been my favorite doll so she is the perfect place for me to start. She was the first doll I ever got brand new from American Girl and that was only three years ago !


Kit lives in the 1930's and she dreams of becoming a writer. Her dad loses his job and he must take a new job in a different city. To make ends meet her mom takes in boarders.  Kit has many adventures with her friends and even solves a few mysteries throughout her book series.

Kit's Books
  • Meet Kit: An American Girl
  • Kit Learns a Lesson: A School Story
  • Kit's Surprise: A Christmas Story
  • Happy Birthday, Kit!: A Springtime Story
  • Kit Saves The Day: A Summer Story
  • Changes for Kit: A Winter Story

Facts about Kit:

Family
  • Margaret Kittredge: Kit's mother
  • Jack Kittredge: Kit's father.
  • Charles Kittredge: Kit’s older brother.
  • Uncle Hendrick: Mother’s wealthy, disapproving uncle.

Friends and Other Minor Characters

  • Stirling Howard: Kit’s close friend and boarder.
  • Ruthie Smithens: Kit’s best friend.
  • Louise Howard: Stirling’s mother and boarder.
  • Roger: A classmate in Kit’s class.
  • Aunt Millie: An older lady from Kentucky who cared for Kit's father as a child
  • Will Shepherd: A young hobo from Texas.

Doll

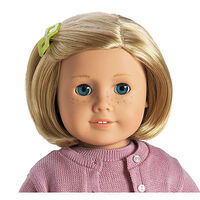
Kitdollface
The Kit doll.
  • Face Mold: Classic Mold
  • Skin: Light
Kit has freckles across the nose and cheeks.
  • Hair: Blond, shoulder length; side part, no bangs.
  • Eyes: Dark Blue

Meet Outfit

  • Lavender-pink sweater and cardigan set
  • Purple flower-print skirt
  • White bloomers
  • Cream canvas sandals
  • Green diamond hair barrette

Meet Accessories

  • White crocheted cloche hat with green ribbon & bow
  • Straw clutch purse
  • Buffalo nickel
  • Compass necklace
  • Handkerchief

Trivia

  • Kit was the first new Historical character released once Mattel had taken over American Girl.
  • Kit was the first character and Historical Character pictured with short hair.
  • Kit was the first character whose doll was released with freckles. 
  • Kit's address is 229 Abbot Place.